SecretDesires AI Image generator: My Unfiltered Thoughts
The NSFW side of SecretDesires AI Image Generator isn’t just a bolt-on gimmick—it’s the heartbeat of the whole platform.
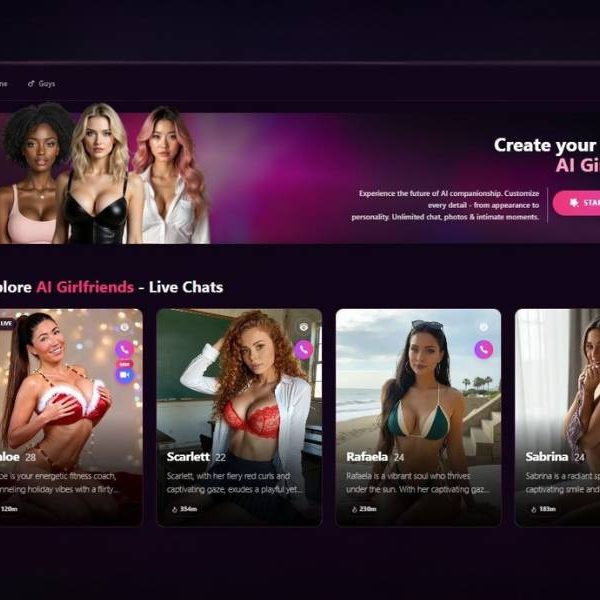
Imagine a sandbox where you’re not just scrolling through someone else’s fantasies but actually building your own, down to the pose, the outfit, the lighting, even the subtle smirk on your AI companion’s face. That’s what it feels like: a little overwhelming at first, but once you dive in, strangely addictive.
Visit SecretdesiresSecretdesires Image Generator — Step-by-Step User Guide
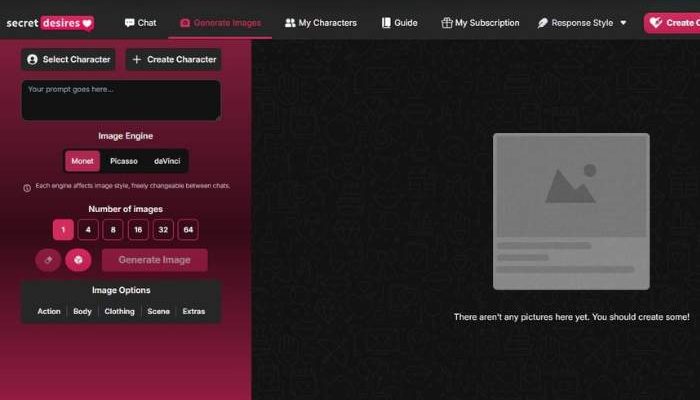
I tried Secretdesires image generation tool and decided to create a detailed user guide. Below is a practical walkthrough that mirrors the interface. Follow the steps in order and you’ll go from a blank page to finished images, with plenty of control over pose, angle, style, and volume.
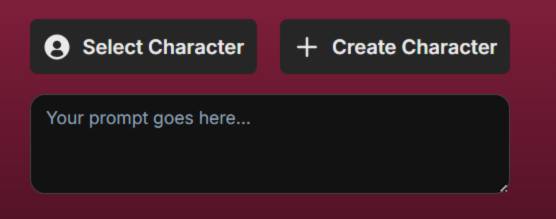
Step 1 — Select or Create a Character
Where: Top of the screen — buttons Select Character and Create Character.
- Select Character: Pick an existing character you’ve saved before.
- Create Character: Start a new character profile. (Most apps open a simple form where you define look/style notes; once saved, you can reuse the character in future generations.)
- Why it matters: locking a character first helps you keep face, hairstyle, vibe, and other traits consistent across multiple images.
Tip: Keep characters clearly labeled (e.g., “Studio Yoga Instructor – brunette, athletic”) so you can find them quickly.
Step 2 — Write a Clear Prompt
Where: The large text box labeled “Your prompt goes here…” (you’ll see this box under the character buttons and again in the main editor area).
What to include (helpful structure):
- Subject & role: “portrait of a fitness instructor”
- Pose/action (optional here; see Step 4 for preset tags): “standing tree pose”
- Camera & angle: “low angle, 50mm lens look”
- Lighting & mood: “soft studio lighting, high contrast”
- Background/scene: “minimal backdrop, gradient burgundy”
- Style cues: “photorealistic, crisp details”
Example (safe & specific):
“Athletic woman in a yoga tree pose, low-angle view, soft studio lighting, minimal burgundy gradient background, photorealistic, crisp details.”
Tips
• Be specific and avoid contradictions (don’t ask for “low angle” and “view from above” together).
• Group related details (camera + angle, lighting + mood) to help the model prioritize correctly.
• If the app supports it, keep a small library of prompts you reuse with different options/engines.
Step 3 — Choose Image Type, Engine, and Batch Size
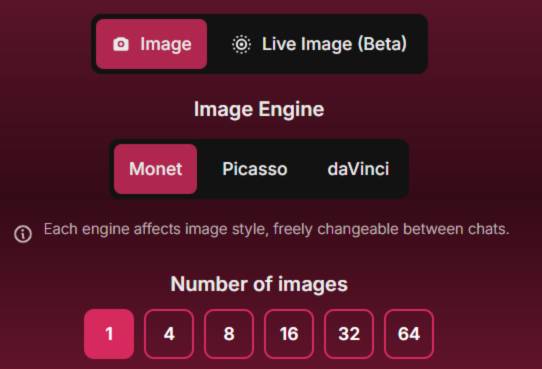
Where: The block labeled Image / Live Image (Beta), Image Engine, and Number of images.
- Image vs Live Image (Beta):
- Image: standard still images.
- Live Image (Beta): experimental mode that may simulate movement or generate image sequences (features can change in beta).
- Image Engine: Monet, Picasso, daVinci
- Engines change the overall look. As a rule of thumb:
- Monet → tends to softer, painterly aesthetics.
- Picasso → often more stylized/interpretive.
- daVinci → usually aims for cleaner, more realistic detail.
- You can switch engines freely between runs to compare styles.
- Engines change the overall look. As a rule of thumb:
- Number of images: 1, 4, 8, 16, 32, 64
- Higher numbers = more variety (and typically more compute/time).
- For quick drafts, use 1–4. For concept exploration, try 8–16. For wide variation hunting, go 32–64.
Tip: When exploring a new character or prompt, run 4–8 images on two engines (e.g., Monet vs daVinci). Pick a favorite, then upscale or refine.
Step 4 — Add “Image Options” (Powerful Presets)
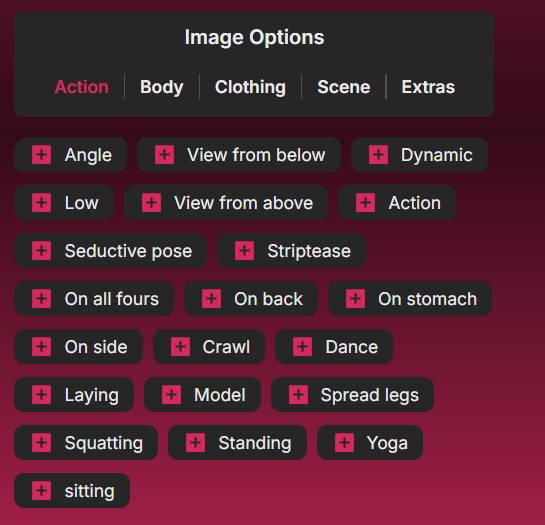
Where: Image Options panel with tabs: Action, Body, Clothing, Scene, Extras.
These options insert targeted keywords into your request. Click the + next to any option to add it; remove it the same way if the UI supports toggling/removing tokens.
Action tab
- Camera/energy cues: Angle, View from below, View from above, Low, Dynamic, Action
- Poses & stances: Standing, Sitting, Squatting, On side, On back, On stomach, Crawl, Dance, Laying, Yoga, Model
- Other options: Some choices are adult-oriented (e.g., “Seductive pose,” “Striptease,” “Spread legs,” “On all fours”). Use responsibly and in line with your platform’s rules and local laws.
How to use Action options well:
- Combine one camera option (e.g., View from below) with one pose (e.g., Standing) to prevent conflicts.
- Don’t stack opposites (e.g., View from above and View from below).
- If you already wrote pose/angle in your prompt, avoid duplicating it with a conflicting preset.
Tip: After Action, explore Body, Clothing, Scene, Extras tabs to layer specifics such as physique details, outfit style, background elements, and finishing effects (these tabs weren’t in your screenshots but typically work the same: click + to add).
Generate, Review, and Iterate
- Once your character, prompt, engine, batch size, and options are set, generate the image(s).
- Review the outputs. Keep the best, then tweak one variable at a time (engine, one Action tag, lighting words) and re-run for controlled improvements.
- Save strong results with the character profile so future sets stay consistent.
Pro Tips (to get consistently good results)
- Start simple, then add: Begin with subject + lighting + one camera angle. If it works, add Action/Body/Clothing tags gradually.
- Avoid contradictions: One clear angle, one clear pose, one clear lighting style.
- Engine A/B testing: If realism matters, try daVinci first; for mood/artistry, test Monet; for bold stylization, try Picasso.
- Batch smartly: Do 8–16 for variation hunts, then reduce to 1–4 for fine tuning.
- Stay compliant: If you use adult-oriented options, keep everything within the platform’s content guidelines and applicable laws.
Quick Checklist
- Character: Select or create.
- Prompt: Write a precise, conflict-free description.
- Type/Engine/Batch: Choose Image (or Live Image Beta), pick an engine, set image count.
- Image Options: Add Action/Body/Clothing/Scene/Extras presets (no contradictions).
Generate → Review → Refine.
How It Works in Practice
You feed it your ideas—maybe you’re in the mood for a sultry, dimly lit boudoir shot or a more playful, anime-style tease. The AI runs with it and spits out NSFW images that are sharper than you’d expect.
Sometimes it nails the vibe instantly. Other times? You tweak the prompt, laugh at the misfire, and try again. In a way, those imperfections make it fun—it’s not sterile; it’s a back-and-forth between you and the machine.
What’s Actually on the Menu
| Feature | What You Can Do |
| Customization | Choose body type, outfits, hair, accessories, backgrounds. |
| Styles | Flip between photorealistic, artistic, or anime vibes. |
| Image Drops in Chat | Pictures land right in conversation flow—feels more immersive than separate gen. |
| Face Swaps | Blend in a specific look (fantasy or familiar). |
| Privacy/Consent Controls | You opt into NSFW mode manually—no slip-ups. |
| Upscaling & Refinement | Polish images for higher resolution or more detail. |
Emotional Layer That Surprised Me
What sets this apart is how it ties image generation to personality. You’re not just creating an NSFW pic—you’re weaving it into a roleplay or conversation. Ever joked around with someone and they suddenly send a cheeky pic?
That’s the vibe. The AI tries to mirror that kind of intimacy. And yes, sometimes it overdoes it, but when it hits just right, it feels uncanny in a good way.
My Honest Impressions
I’ll be straight: I didn’t expect to like it as much as I did. Other platforms I’ve toyed with either felt too stiff (clinical menus, endless sliders) or too chaotic (random outputs with no soul).
Here, SecretDesires leans more into the “companion” experience—it feels personal. The prompts matter, but so does the ongoing chat, and that combination gives the images context. That’s the magic sauce.
Drawbacks? The generator occasionally forgets a detail you clearly asked for—like “lace stockings” becoming “random thigh-highs.” And if you’re not careful, you’ll burn through credits fast. But in all honesty, those quirks just remind you this isn’t a perfect machine—it’s a playful one.
Who Should Try It?
| Type of User | Why It Works for Them |
| Curious Newcomers | Free trial and simple prompts let you dip your toes in. |
| Fantasy Explorers | Tons of flexibility with styles and characters. |
| Roleplay Enthusiasts | Chat + image integration makes it more immersive. |
| Privacy-Conscious Users | Encrypted chats, manual NSFW opt-in, and face swaps for anonymity. |
Final Thoughts
SecretDesires’ NSFW image generator isn’t just about nudity on a screen—it’s about blending fantasy with interaction. If you’re looking for an outlet that adapts to your mood, remembers your quirks, and lets you see those fantasies come alive in images, it’s worth the experiment.
Personally? I’d say give the free trial a whirl, mess around with a few prompts, laugh at the odd mistakes, and see if it clicks with you. If it does, don’t be surprised if you find yourself checking in more often than you planned.
